As a member of the Araceae plant family, the Alocasia Polly is one of the less demanding plants you can acquire.
To grow and care for it, use well-aerated soil that retains enough moisture to keep the plant hydrated. The soil should be consistently moist, but don’t over-water it.
Fertilize the plant once a month and keep the pot somewhere with bright, indirect light and a temperature over 65℉. That should do it!
- What Are Alocasia Polly Plants?
- How to Care for Alocasia Polly Plants?
- Provide Indirect Sunlight
- Mix Your Own Soil
- Add an Adequate Amount of Water
- Control the Temperature
- Provide a Balanced Fertilizer
- How to Grow Alocasia Polly Plants?
- How to Repot Alocasia Polly Plants?
- How to Care for Alocasia Polly Plants in All Seasons?
- How to Propagate Alocasia Polly Plants?
- What Family Do Alocasia Polly Plants Belong to?
- How Long Do Alocasia Polly Plants Live for?
- What Are Common Pest and Plant Diseases for Alocasia Polly Plants?
- Pests
- Diseases
- How to Tell If Alocasia Polly Plant Is Not Growing?
- Are Alocasia Polly Plants Poisonous?
- How to Help Alocasia Polly Plant to Grow?
What Are Alocasia Polly Plants?
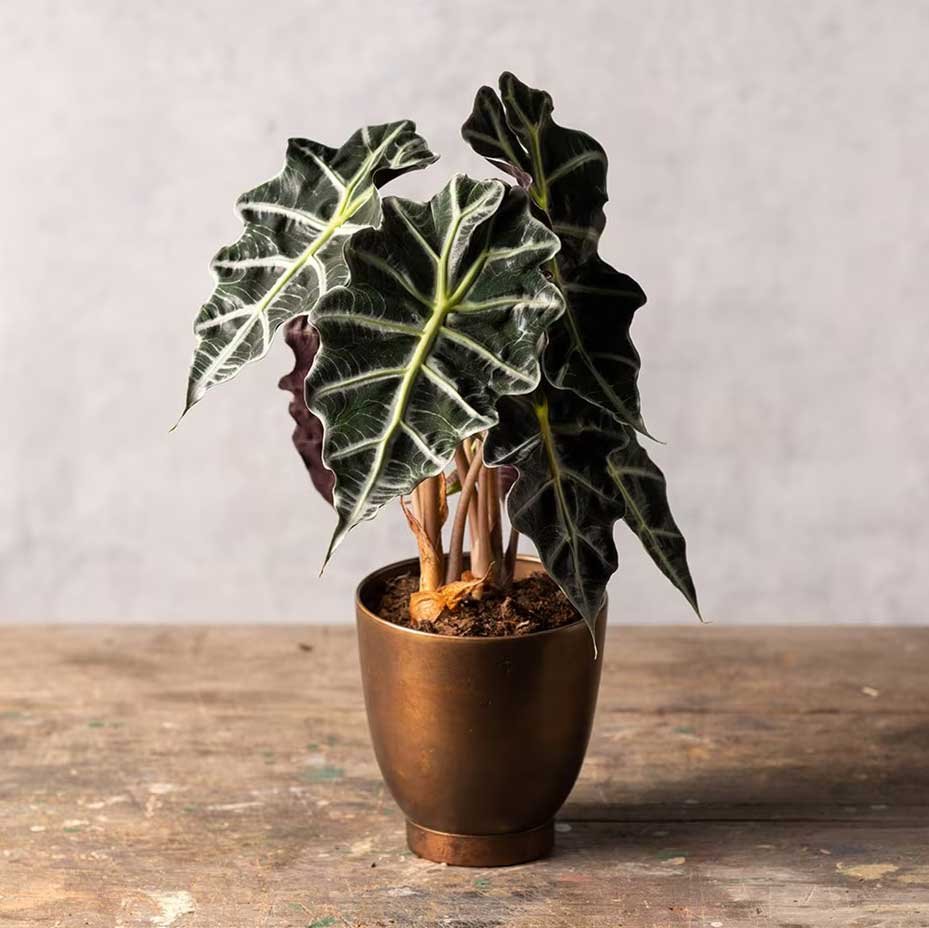
The Alocasia x amazonica ‘Polly’ is a distinctive plant that hails from the tropical lands of South Asia and belongs to the famous Araceae family (Aroid plants). It’s often called the African Mask Plant because of its saturated colors and bold markings that resemble an African mask.
The iconic heart-shaped dark green leaves and creamy veins make a bold statement and increase the aesthetics of any indoor space tenfold.
You don’t have to be an experienced phytologist to grow this plant. It’s as beginner-friendly as plants get.
If you provide an ideal growing environment, you can expect it to grow to 2 ft tall and wide. So, it’ll take up a good chunk of your house garden.
Quick Summary of Alocasia Polly
Now, you have a general idea of the origin and visual appeal of the Alocasia Polly.
We’ve barely scratched the surface, though. Let’s go a bit more in-depth:
- Scientific name: Alocasia x amazonica ‘Polly’
- Common names: Alocasia Polly, African mask plant, Elephant’s ear
- Light: Bright, indirect light
- Watering: Keep the soil moist
- Temperature: Above 65℉
- Hardiness zone: 10-12
- Soil pH: Acidic
- Soil type: Rich, well-draining, moist
- Repotting: Every 2-3 years
- Pruning: In spring or summer
- Size: 2-3 ft tall and wide
- Bloom time: Spring
- Propagation: The division method
How to Care for Alocasia Polly Plants?
You won’t enjoy the beauty of an Alocasia Polly unless you know how to care for it. Luckily for you, we’ll cover every step in the process here.
The first thing you want to focus on is the soil. Choose a well-draining type, and keep it moist all the time but not soggy.
The Alocasia Polly loves warm climates, so keep the temperature above 65℉ and expose it to bright, indirect sunlight. Fertilize your plant every month, and you’ll have a happy Alocasia.
Provide Indirect Sunlight
The Alocasia Polly is native to tropical lands, where tall canopy trees block most of the sunlight, preventing it from making direct contact with the plant.
That’s why it thrives in bright, indirect sunlight. So, you want to place it in front of north-facing windows. These usually don’t receive direct light because they face away from the sun.
If you’re dead set on placing it in front of a south-facing window, you should at least keep it behind a curtain. It’ll filter enough of the sunlight, protecting the leaves from potential burns.
If your Alocasia isn’t growing at the right pace, it’s probably not receiving enough sunlight. Consider removing it to a brighter spot.
Helpful tip: Rotate the pot now and then to ensure every part of your Alocasia receives sufficient sunlight.
Mix Your Own Soil
Ultimately, your soil should retain enough moisture to keep the plant hydrated all the time but drain excess water to prevent root rot.
For a soil mix to do this, it should be light, rich, and well-draining with plenty of air pockets to give the roots room to breathe. Where can you find that? That’s the problem.
That type of pre-mixed soil is difficult to find on the market, so your best bet is to make it at home.
It sounds complicated, but it’s simpler than you think and might even be more cost-effective in the long run.
To mix the soil, combine two parts coconut coir, one part perlite, one part fir bark, and one part worm castings.
At first glance, they sound like random components mushed together, but each ingredient in that mix plays a crucial role. Coconut coir prevents waterlogging and improves water retention.
Perlite helps with drainage, fir bark enhances aeration, and worm castings provide nutrients.
You can also combine equal parts potting mix, sphagnum moss, perlite, and bark. Sphagnum moss prevents excess moisture loss. So, that mixture works as effectively.
Add an Adequate Amount of Water
If you’re a new plant parent, your first instinct might be to shower your child with love and care. So, you water it daily to ensure it grows strong and healthy.
That’s a recipe for disaster, though. Watering the Alocasia Polly is a bit complicated because it doesn’t have a set watering routine.
Your goal is to keep the soil consistently moist. That means watering it as much as possible.
Here’s the problem: With that type of watering routine, you can easily fall into the trap of over-watering your plant, which causes root rot and leaf discoloration.
So, always check the surface of the soil first. If it’s moist, you don’t have to water it. Wait until it’s dry, but don’t wait too long until the soil dries out because that would cause dehydration.
Helpful tip: Avoid terracotta pots. They dry the soil out too quickly.
Control the Temperature
As an inhabitant of tropical Asian lands, Alocasia Polly plants prefer warm environments. Avoid the cold climate at all costs.
Ideally, you want to keep the temperature above 65℉. That shouldn’t be a problem for most people, given that’s the average room temperature.
If it drops lower than that, your Alocasia will think it’s time to go dormant. You’ll have to wait a long time before it becomes active again, and if it gets too cold, your plant might die.
Provide a Balanced Fertilizer
The Alocasia Polly isn’t a heavy feeder, but it still requires a decent amount of nutrients to grow healthy leaves, especially during spring, its growth season.
On average, apply fertilizer once every month and stick to a diluted, balanced type to sustain your plant’s growth.
If you suspect your plant has been a victim of pests, don’t fertilize it. That will do more harm than good.
How to Grow Alocasia Polly Plants?
You already know how to care for a young Alocasia Polly. Good job! Do you know how to grow its seeds, though?
Alocasia Polly plants rarely produce seeds. So, when yours does, you better be ready to plant them and grow more Alocasias.
The first step is to wait for the pods containing these seeds to dry out.
If you retrieve the seeds before that, they won’t be mature enough, and you won’t get a vital, healthy plant.
When the pods dry out, their color will change, and they’ll curl downwards. The seeds won’t be that clean, so you might want to wipe them with paper towels or soak them in water before dealing with them.
Now, plant them in well-aerated soil that can offer them enough moisture to grow strong. You can buy a typical houseplant soil and add perlite to it.
Again, you want to keep the soil moist but not soggy and place the pot somewhere with bright, indirect sunlight and a temperature of 70℉ or above.
Note: Not all the seeds will grow at the same rate. Some might take a couple of weeks to start germinating. Others might take a couple of months.
Over time, your Alocasia will outgrow its pot, and you’ll have to replant it in another one that’s one or two inches larger.
How to Repot Alocasia Polly Plants?
Alocasia Polly plants take two or three years to outgrow their pots. In some cases, it might even take a few years, so you have plenty of time to learn how to repot them.
When it’s time to do so, follow these steps:
- Grab a larger pot and fill its bottom third with your potting mix. You can pour some water on it to help it settle, but it’s not necessary.
- Take your Alocasia out of its small pot and check the roots to ensure they’re healthy.
- Place your plant in the new pot, filling the rest of it with soil.
- Water the soil and place the pot somewhere warm with bright sunlight.
How to Care for Alocasia Polly Plants in All Seasons?
You know what people say: There’s a time and place for everything. That also applies to your Alocasia Polly care routine.
The plants care routine will change depending on the season.
During the winter, you’ll reduce the watering frequency. The plant enters its dormant phase during that season, so the soil takes longer to dry, which increases the time between waterings.
You’ll also want to keep the plant away from windows during winter because it can’t handle the cold.
When it comes to repotting, the best time to do so is during the spring or summer because that’s the plant’s growth season.
How to Propagate Alocasia Polly Plants?
So, you’ve bought your first Alocasia Polly, and it’s added all the energy and life you hoped it would add to your house. Now, you want to acquire a few more Alocasias.
Here’s the thing: You don’t have to buy new ones. You can learn how to propagate plants and use that knowledge to grow new Alocasias. Here’s how:
- Lift your Alocasia off the pot and loosen the soil with your hand to unravel the small offshoots.
- Cut the small roots with a sharp pair of scissors or a knife.
- Place the roots in the soil and provide a proper growing environment.
Now, wait for the new Alocasias to grow.
What Family Do Alocasia Polly Plants Belong to?
Alocasia Polly plants belong to the Araceae plant family. Species within that family are usually divided into rhizomatous or tuberous.
The Alocasia Polly belongs to the former. Besides Alocasias, the other Araceae types include the Anthurium, Caladium, and Monstera plants.
How Long Do Alocasia Polly Plants Live for?
No one can say for sure how long Alocasia Polly plants can live. It depends on whether or not you provide an environment that caters to their needs.
If you create the ideal growing environment, they can last five years, maybe even more.
What Are Common Pest and Plant Diseases for Alocasia Polly Plants?
Alocasia Polly plants are sturdy and durable, but they’re not invincible. Like most plants, they’ll face pest infestations and diseases at one point.
When that happens, you need to be ready.
Pests
Pests are plants’ Achilles heel. No matter how strong your Alocasias are, one infestation can bring them down.
What kind of infestations do they face, though? Spider Mites
If you notice small yellow and white spots appearing on the leaves of your Alocasia, move it away from other plants.
That means it’s become a victim of spider mites. Now, cut the damaged leaves/stems, and you’ll have a happy, healthy plant.
Diseases
Fungal diseases are probably the most common threat Alocasia Polly plants face. They usually occur when you mist the leaves, which is taboo in the world of Alocasia Polly plants.
If that happens, cut all the affected leaves and avoid misting your plant in the future.
How to Tell If Alocasia Polly Plant Is Not Growing?
The obvious answer here is to keep tabs on the plant’s growth rate. However, you can also look at the roots.
If they’re mushy and discolored, you might want to reassess your care routine. Maybe you’re not using proper soil or have exposed the plant to cold temperatures.
Stunted growth doesn’t always mean you did something wrong. If the roots look fine, your Alocasia might just be in its dormant stage.
Are Alocasia Polly Plants Poisonous?
Unfortunately, Alocasia Polly plants don’t taste as good as they look. Like many other Araceae plants, their leaves contain calcium oxalate, which is poisonous to pets.
It causes vomit, extreme stinging in the mouth, edema, and more.
How to Help Alocasia Polly Plant to Grow?
Growing a houseplant doesn’t always go as planned. You think you’re doing well and providing your plant with all the nutrients it needs. Then, the leaves start drooping/curling, their color starts changing, and the plant stops growing.
That’s a big problem, as it suggests your care routine doesn’t check all the marks. So, you might want to change the soil, the location of the pot, or your watering schedule.
Start by changing one of them and see if it makes a difference. If not, move to the next. It won’t be long before your plant regains its energetic demeanor.